Sunday, April 3, 2011

Art Display

I needed something in the playroom to display all of Breanna's arts and crafts that she has been taking home from Sunday School, Bible study and Mops (which is ALOT!). My nieghbor found a similar piece at Home Goods that had three clips on it and I got inspired. My dad did the wood work for me and then I painted it red. In case you wanted to make one for yourself the clips are called #3 bulldog clips.


I want to put some black vinyl lettering on the piece, but I need ideas...what should it say? My neighbor's said "Look what I did!"


I could actually use like 5 more of these to hold all the stuff that Bre brings home, but that would be a little excessive.

Thursday, March 24, 2011

All Tied Up

There are not a lot of opportunities to sew for my little guy, but for Easter I thought I would gussy up his outfit a little bit. I ran across this brilliant tutorial for making "little man ties" - soooo quick and easy! You'll have to try it for your favorite little man.

Ian's tie for Easter

Being a SAHM means I have to be creative with the clothes budget. Shirt was free at Kohls (with their $10 coupon in the mail), pants from Target on clearance for $2.50 and I "splurged" on the hat at $7. The tie was made out of a dress shirt of Craig's that he never wears.


I dressed up the pants a bit by adding a cuff.

And this tie is for my nephew - this may be addicting...
Now for a Easter photo shoot!


Wednesday, March 16, 2011

Travel Art Kit

So I thought I would try writing my first tutorial / pattern. I designed this art kit, because Breanna likes to color anywhere, any place. I love this project only uses scraps and makes a great present for kids. Please leave me a comment if any of the steps are unclear.
Here is the pattern. Just cut out the pieces to the correct dimensions as the pattern is not to scale.
I used a 1/4 inch seam allowance unless otherwise stated.

1. Trim the corners off the interfacing and iron onto the wrong side of the front cover.
2. Optional: Use wonder under and a zig zag stitch to attach an intial to the front cover.
(that's a whole other tutorial!)


3. Fold the pencil pocket with right sides together and stitch down one side of the pocket.
Turn right side out and press.
4. Fold the handles with right sides together and sticth down the sides.
Turn right side out and press.

5. With right sides together sew down the long side of the crayon pocket. Optional: Sew small ric rack into the seam. Turn right side out and press.

6. Fold notebook pocket in half with right sides out and place the pencil pocket as shown. Sew down left side of pocket and baste around the edges.

7. Fold the inside panel in half and lightly press. Unfold. Lay the crayon pocket about one inch from the centerfold on the left side and sew in place. Baste edges, leaving the top (ric rac side)open.

8. Starting 1 1/4 inches in, mark every inch using a water soluble pencil or pen. Sew down lines to create the pockets for the crayons.


9. Measure and mark every 3/4 of an inch on the pencil pocket and sew down to create the pockets for the pencils.
10. Line the notebook pocket up with the right hand side of the inside panel and baste arond the outside edges.

11. Place rubber band in the center edge of the panel and place handles 1 1/4 inches on either side of the rubber band. Baste into place.
12. Baste handles onto opposite side.


13. With right sides of the front cover and inside panel together sew all the way around the pieces. Use a 3/8 inch seam allowance. Leave about 4 inches open to turn. Trim corners, and turn right side out.
14. Press edges. Sew opening closed.


15. Sew large button onto cover.
Fill with goodies!
The art kit holds 10 crayons, 7 colored pencils and one 6 x 9 notebook (found at Target or Dollar Tree)
Hope that wasn't too difficult! Would love to hear feedback if you give it a try. Have fun!

Tuesday, March 8, 2011

Robots and Rocketships

I recieved a package in the mail today that brought me smiles. It is the fabric for the quilt that I want to make Ian. Of course, getting new fabric always makes me happy, but I am so excited about these finds. Moda just came out with this new robot fabric and I just love the grey! Breanna's "big girl" quilt took much longer than I anticipated, so I wanted to start early on Ian's. For his quilt I am invisioning horizontal stripes of various widths and making a sham with an appliqued robot.


The fabrics are Full Moon in tangerine and slate by Amy Butler
Robots by David Walker in Aqua, Orange and Red (I have had these since before Ian was born)
Robotics Squares and Robotics Rockets in grey by Moda

I am thinking of doing something similar to the Dr. Suess quilt from Pottery Barn


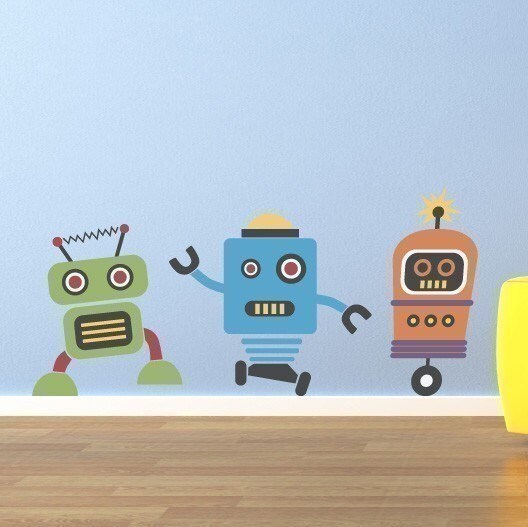
These are some vinyl wall art from etsy that I think might look really cute in the room.


It's so fun designing and planning, but then I am actually having to admit that baby boy won't be a baby forever. Also, when am I going to have time to sew when I make a 2 minute phone call and find this....??

my boy who is ALWAYS hungry!

Friday, February 18, 2011

B-R-E-A-N-N-A

Breanna wrote her name for the first time! I have been working with her on learning the letters one by one. She had learned B-R-E and yesterday she decided to just pick up the rest almost instantly. She was so proud of her self (and of course mommy was too)! The name Breanna means "strong" and her middle name Claire means "bright" - so far she has lived up to her namesake (even if she is more strong-willed than physically strong :) ).


The name in pink she had some help with and the one in yellow she did herself!

Thursday, February 10, 2011

Cake Pops!

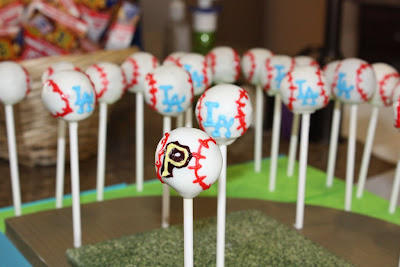
I got this book from Amazon a while back, but had yet to try making cake pops. The perfect opportunity arose: my nephew's 4th birthday and my dear friend's 30th birthday on the same day. Both are known sweet tooths, so I thought I would give these a try. They are just as time consuming as everyone says, but ohhh do they taste good!

Alex had a Dodger baseball theme so I made some baseballs for all the guests.


The lonely Pirates cake pop was for Craig
Ian, Grammy and the birthday boy sporting Dodger blue!
For Julie, I made froggie cake pops (surprisingly easier than the baseballs)
Julie has always liked frogs...don't ask me why, I can't stand them. She even used to swim with them in her pool!
YUM!

Sunday, January 30, 2011

A gift that warms my heart...and feet!

Ever since we moved into our house (almost 3 years ago) I had been anticipating updating our fireplace. It wasn't because it was dated, it was just....well, blah. So I asked / begged my dad to make a mantle for my Christmas present this year. He was more than willing. He said to make a design and he would build it. When dad got close to having it done, Craig and I started on the demo (also with dad's help - wish we had a video of the crazy man hacking away at the tile with a crowbar!). My dad puts so much detail into his projects. Take for instance the Barbie house he made for me as a girl. He added a porch, wooden shingles and wallpaper. I apparently made a somewhat challenging design, but he figured out how to make it - that's what he's good at. We LOVE the way it turned out. Here are some pics.

The before


Umm...what did we get ourselves into? Notice the treasure we found too!


the mantle is hung and drywall is fixed

We tiled with travertine subway tiles to give it a stone / brick look

The routing on the corbel is what gave dad a challenge

The finished look...just in time to hang the stockings! We love the way it turned out and feel quite proud that we learned how to drywall and tile.

and a Christmas picture, 'cause the kids look so cute dressed up